MB Medic Mercedes-Benz Repair Guides, Service, How To DIY

Last updated:
Step-by-step instructions on changing the oxygen (O2) sensor in your car.
Is the check engine light on because of a bad oxygen sensor? You don’t have to spend your life savings replacing a defective O2 sensor. Here we will show you the steps to replace an oxygen sensor successfully. An oxygen-sensor-related fault code does not necessarily mean the sensor itself has failed. The fault may be caused by the sensor, its wiring or heater circuit, an exhaust leak, fuel-mixture problem, or another engine-management issue. Diagnose the fault before replacing the sensor
To replace the oxygen sensor (O2), you will need the following:
A new oxygen (O2) sensor, which you can purchase online and save a lot. If you go to Amazon, you will see that new oxygen sensor prices for Mercedes-Benz cars range between $30 and $80. Click here to find the right sensor for your car on Amazon.
Oxygen Sensor Removal Tool: Removing the oxygen sensor from the exhaust pipe can be challenging, especially when there is limited space between the sensor and the car frame or engine. If you remove the downstream sensor, you may get away with using a wrench. Still, to remove the upstream sensors, you will need an oxygen sensor removal tool set.
How to Replace the Oxygen (O2) Sensor. Step-by-step instructions.
Step 1: Get the fault codes.
Scan your car’s ECU using an OBD-II scanner. It’s very easy if you have never used an OBD-II scanner before. You will need an OBD scanner to get the fault codes. Here are the best-selling OBD-II scanners on Amazon, and any of these will work fine. Your OBD-II port, where you plug in the scanner is typically located under the driver’s side dashboard, although its exact location varies by model and year. You can see an example in the picture below. Another amazing OBD-II scanner for Mercedes-Benz is the YOUCANIC Scanner. The YOUCANIC Scanner is a professional-grade scanner that can read and clear fault codes in many Mercedes-Benz systems, helping you fix your car like a pro.
Step 2: Locate the defective oxygen sensor.
Once you scan your car, you will get a fault code that directs you to the faulty oxygen sensor, for instance, Bank 1 Sensor 2. Bank 1 refers to the cylinder bank containing cylinder No. 1. Sensor 1 is generally the upstream sensor, while Sensor 2 is generally downstream of the catalytic converter. An O2-related fault code can help identify the affected sensor circuit, but it does not necessarily mean the sensor itself has failed. Diagnose the sensor, wiring, heater circuit, and related engine/exhaust conditions before replacing the sensor. Which sensor would that be? There are usually four oxygen sensors on your Mercedes-Benz. Look at the picture below to locate the sensor that needs to be replaced. Our guide to oxygen sensor locations on a Mercedes-Benz shows how the sensors are numbered so you replace the one the code is actually pointing at. The picture shows the engine removed, but you don’t need to do that to replace an O2 sensor ;). The number and type of oxygen/air-fuel sensors vary by engine and emissions configuration. V6 and V8 engines may use separate sensors for each bank, with sensors located before and/or after the catalytic converters. Warning: The exhaust system and oxygen sensors can become extremely hot. Allow the exhaust system to cool before removing the sensor unless you are following a procedure specifically designed for a warm component. Wear appropriate gloves and eye protection.
Step 3: Remove the undercarriage to access the Oxygen Sensor.
Most modern cars, including those from Mercedes-Benz, have a plastic cover underneath. Don’t let that intimidate you. The lower engine splash shield is typically secured with a combination of screws, clips, and/or fasteners. The exact hardware varies by model. Once you remove the undercarriage cover, you should be able to see the oxygen sensors.

Step 4: Unplug the oxygen sensor electrical connector.
Separate the electrical connections by pulling them apart. In some cases, you may see little tabs that you will need to press to be able to unplug the old oxygen cable connector. 
Step 5: Remove the oxygen sensor wiring from its retaining clips.
The oxygen sensor cable will have one or two clips that hold the O2 sensor wire. Remove the wire from these clips. Pull on the clip and slide out the cable. Route and secure the sensor harness using the original clips and retainers. Keep the wiring away from hot exhaust components and moving parts.
Step 6: Place the oxygen sensor removal tool on the old sensor.
Start by placing the oxygen sensor removal tool on the old oxygen sensor as shown in the picture below. Place the oxygen sensor removal tool on your O2 sensor as demonstrated on the removed sensor. 
Step 6: Remove the oxygen sensor.
Next, remove the old oxygen sensor. Use the correct oxygen-sensor socket and apply controlled force. If the sensor is seized, allow the exhaust to cool to a safe temperature and use an appropriate penetrating product or manufacturer-approved removal method. Avoid damaging the exhaust bung.
Step 7: Install a new oxygen sensor.
Install the new oxygen sensor, which we showed you how to buy online for under $100 in reverse order. It is recommended to apply anti-seize compound on the threads of the new O2 sensor. It will help prevent the sensor from seizing and make it easier to remove next time. If the replacement sensor does not already have thread compound applied, follow the sensor manufacturer’s instructions regarding anti-seize. Do not apply compound to the sensor tip, and avoid contaminating the exhaust or sensing element.
Torque Tightening Specifications
For the specific application shown in this guide, the specified torque is 55 Nm (40 ft-lb). Verify the correct specification for your vehicle, then tighten to that figure with a torque wrench. This is not a fastener to judge by feel: over-tightening can seize the sensor in its boss or strip the threads in the exhaust, which turns a sensor job into an exhaust repair, and under-tightening leaves it leaking, which upsets the readings you just paid to fix. If you have no torque wrench to hand, thread the sensor in by hand until it is hard to turn and then go about half a turn further, but treat that as a stopgap and check it against the figure when you can.
What is the Best Scanner to Use for Diagnosing my Mercedes-Benz?
The YOUCANIC full system diagnostic scanner is essential for troubleshooting Mercedes-Benz problems. This powerful diagnostic tool can help identify and diagnose issues with your vehicle’s engine, transmission, brakes, and other critical systems by reading and interpreting fault codes stored in your car’s computer system. With detailed information about the problem, you can make more informed decisions about repairs and maintenance, potentially saving time and money on costly repairs.
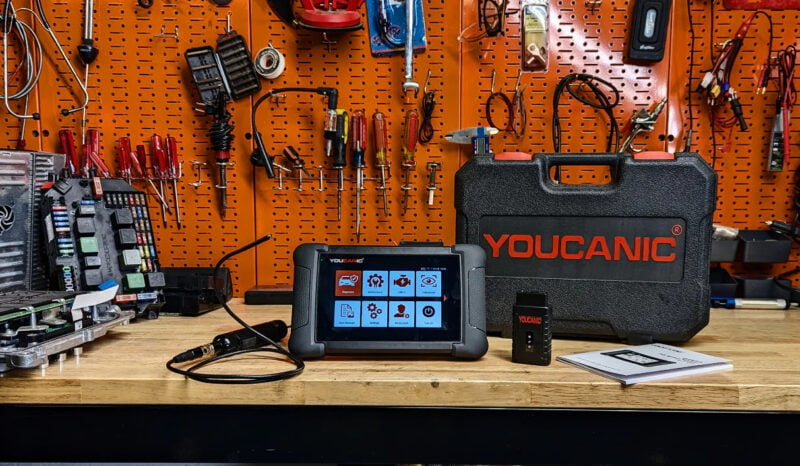
In addition to its diagnostic capabilities, the YOUCANIC scanner can also perform diagnostic tests on various systems, including the ABS, airbag, and steering systems, to help pinpoint the root cause of any issues. Whether you’re a DIY mechanic or a professional technician, this tool can help you diagnose and solve even the most complex automotive problems quickly, making it an essential tool for anyone who wants to maintain their Mercedes-Benz and keep it running smoothly for years to come. With the YOUCANIC scanner in your toolbox, you can approach any Mercedes-Benz problem with confidence, knowing that you have the tools and knowledge to tackle any issue that arises.
Frequently Asked Questions
Where to buy a cheap oxygen sensor for my Mercedes-Benz?
If you are looking to purchase a replacement oxygen O2 sensor and save a lot on the part cost, you can find the right sensor for your car on Amazon. See this list we put together of O2 sensors that fit Mercedes-Benz cars. You should be able to enter the year, make, and model of your car to narrow it down to the exact fit for your car. You should see a list of less expensive Original Equipment (OEM) brands, such as the Bosch oxygen sensor on the list.
What is the cost of changing the Mechanic / Dealer?
You will probably know the answer to this one already. The cost to replace the oxygen sensor can range from a few hundred dollars if you use your independent mechanic and as much as $1000. Replacing the oxygen sensor is a task you can tackle and save a lot of money.
How difficult is it to replace the oxygen sensor?
The answer to this question depends on which sensor you need to replace. The downstream sensors are easy to access and thus easy to replace. The upstream sensors can be more difficult to reach, which makes them harder to remove. You need an oxygen sensor tool to help you with this task.
Applicable Models
The basic removal and installation process is similar on many vehicles, but sensor location, connector routing, access, torque specifications, sensor type, and replacement procedures vary by vehicle.They especially apply to Mercedes-Benz car models such as C, E, S, CLK, CLS, CL, ML, GLK, GL, SLK, and SL classes.
How to Video
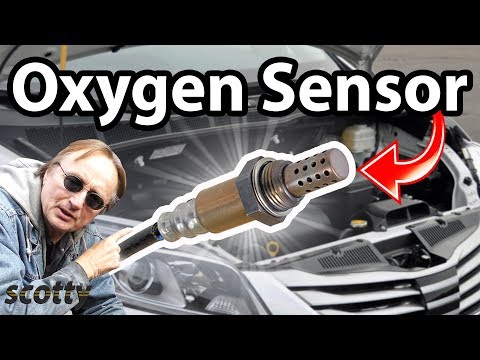
Watch this very informative video on how to replace the oxygen sensor.
Check Engine OBD 2 Fault Codes related to the Oxygen Sensor.
Here is a list of some fault codes related to oxygen sensors, but more codes could not be shown in this list. An O2 code does not always mean the sensor has failed: a slow-response or efficiency code can be the catalytic converter rather than the sensor, and lean or rich running often shows up as fuel trim codes P0170 and P0173 caused by unmetered air upstream. Read the freeze frame data before buying a sensor.
| P0130 O2 Sensor Circuit Malfunction (Bank 1 Sensor 1) |
| P0131 O2 Sensor Circuit Low Voltage (Bank 1 Sensor 1) |
| P0132 O2 Sensor Circuit High Voltage (Bank 1 Sensor 1) |
| P0133 O2 Sensor Circuit Slow Response (Bank 1 Sensor 1) |
| P0134 O2 Sensor Circuit No Activity Detected (Bank 1 Sensor 1) |
| P0135 O2 Sensor Heater Circuit Malfunction (Bank 1 Sensor 1) |
| P0136 O2 Sensor Circuit Malfunction (Bank 1 Sensor 2) |
| P0137 O2 Sensor Circuit Low Voltage (Bank 1 Sensor 2) |
| P0138 O2 Sensor Circuit High Voltage (Bank 1 Sensor 2) |
| P0139 O2 Sensor Circuit Slow Response (Bank 1 Sensor 2) |
| P0140 O2 Sensor Circuit No Activity Detected (Bank 1 Sensor 2) |
| P0141 O2 Sensor Heater Circuit Malfunction (Bank 1 Sensor 2) |
| P0142 O2 Sensor Circuit Malfunction (Bank 1 Sensor 3) |
| P0143 O2 Sensor Circuit Low Voltage (Bank 1 Sensor 3) |
| P0144 O2 Sensor Circuit High Voltage (Bank 1 Sensor 3) |
| P0145 O2 Sensor Circuit Slow Response (Bank 1 Sensor 3) |
| P0146 O2 Sensor Circuit No Activity Detected (Bank 1 Sensor 3) |
| P0147 O2 Sensor Heater Circuit Malfunction (Bank 1 Sensor 3) |
| P0150 O2 Sensor Circuit Malfunction (Bank 2 Sensor 1) |
| P0151 O2 Sensor Circuit Low Voltage (Bank 2 Sensor 1) |
| P0152 O2 Sensor Circuit High Voltage (Bank 2 Sensor 1) |
| P0153 O2 Sensor Circuit Slow Response (Bank 2 Sensor 1) |
| P0154 O2 Sensor Circuit No Activity Detected (Bank 2 Sensor 1) |
| P0155 O2 Sensor Heater Circuit Malfunction (Bank 2 Sensor 1) |
| P0156 O2 Sensor Circuit Malfunction (Bank 2 Sensor 2) |
| P0157 O2 Sensor Circuit Low Voltage (Bank 2 Sensor 2) |
| P0158 O2 Sensor Circuit High Voltage (Bank 2 Sensor 2) |
| P0159 O2 Sensor Circuit Slow Response (Bank 2 Sensor 2) |
| P0160 O2 Sensor Circuit No Activity Detected (Bank 2 Sensor 2) |
| P0161 O2 Sensor Heater Circuit Malfunction (Bank 2 Sensor 2) |
| P0162 O2 Sensor Circuit Malfunction (Bank 2 Sensor 3) |
| P0163 O2 Sensor Circuit Low Voltage (Bank 2 Sensor 3) |
| P0164 O2 Sensor Circuit High Voltage (Bank 2 Sensor 3) |
| P0165 O2 Sensor Circuit Slow Response (Bank 2 Sensor 3) |
| P0166 O2 Sensor Circuit No Activity Detected (Bank 2 Sensor 3) |
| P0167 O2 Sensor Heater Circuit Malfunction (Bank 2 Sensor 3) |
| P1031 component G3/3 (O2-in CAT front left detector) and G3/4 (O2-in CAT front right detector) exchange |
| P1032 O2 sensors upstream TWC mixed up G3/3, G3/4 |
| P2008 component G3/9 (right O2 sensor, before CAT, CYL 1-3) heating (P0135) |
| P2008 Heating of component G3/4 (Right O2 sensor,before TWC[CAT])(P0135) |
| P2009 component G3/13 (right O2 sensor,after CAT,CYL 1-3)(P0141) |
| P2009 Heating of component G3/6 (Right O2 sensor,after TWC[CAT])(P0141) |
| P200C G3/4 (Right O2 sensor,before TWC[CAT]) Aging,correction variable exceeded |
| P200C G3/9 (right O2 sensor, before CAT, CYL 1-3) aging, calibration program jump over |
| P200D G3/4 (Right O2 sensor,before TWC[CAT]) Aging,period too long (P0133) |
| P200D G3/9 (right O2 sensor, before CAT, CYL 1-3) aging, used too long (P0133) |
| P200E G3/13 (right O2 sensor, after CAT, CYL 1-3) no special status variation |
| P200E G3/6 (Right O2 sensor,after TWC[CAT]) |
| P200F G3/4 (Right O2 sensor,before TWC[CAT])(P0130) |
| P200F G3/9 (right O2 sensor, before CAT, CYL 1-3), too small voltage up (P0130) |
Before you buy parts, scan every control module, not just the engine. It shows the root fault behind the warning lights and tells you whether the problem is still active. See how to do a full health check.