MB Medic Mercedes-Benz Repair Guides, Service, How To DIY

Last updated:
In this guide (5 sections)
Step-by-step instructions on replacing the valve cover gaskets on the Mercedes-Benz M112 V6, fitted to the C-Class, CLK, E-Class, ML, S-Class and SLK. The full application list and part numbers are at the foot of this page.
When the valve cover gasket leaks oil, it drips on the exhaust manifold. As the engine warms up, oil on the exhaust manifold burns, and the odor may enter the cabin. Either cover can do it, and a bad leak will smoke.

This is an intermediate DIY repair. Access and required disassembly vary by model.
Parts Needed
Tools Needed
- 3/8 Ratchet + extension
- 3/8 T Socket Torx Bit Set
- 3/8 E Socket Bit Set
- Screwdrivers
- Spark Plug Boot removal tool, optional but helpful
- Low-range inch-pound torque wrench that reads accurately at 80 in-lb, or 9 Nm.
Step by Step Instructions with Pictures
-
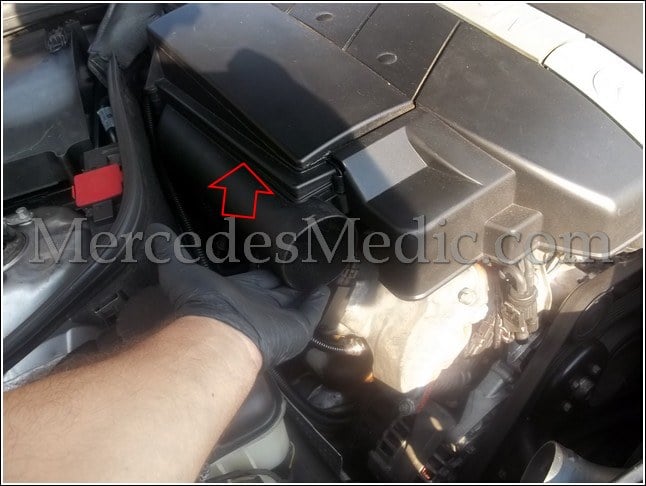
Let the engine cool completely before starting. Do not work near an open flame, sparks, or smoking materials. Remove the air ducts that go to the engine cover. Depending on your cover, you may have two air ducts or just one on some older covers. Pull the air ducts toward the front of the vehicle.

-
Remove the air duct on the opposite side by pulling it toward you.
-
Lift one side of the engine cover about two inches to release it, then release the opposite side.
-
Now grab the cover on both sides and lift it. It is not bolted down but held in place with a few clips.
-
Locate the right-side valve cover. A black crankcase breather hose connects near the rear of the cover. Release the fitting before pulling the hose off, and do not pull on the brittle plastic tube itself. On some models a fuel line runs across this area and has to be moved aside. If yours does, relieve the fuel pressure and follow all fuel-system safety precautions before opening the line.
-
Remove the wires connected to the coil packs. Press the release tabs and unplug the ignition coil connectors. On the right side there are three ignition coils, one per cylinder on that bank.
-
Remove the ignition coil bolts with a T30 Torx bit.
- Pull the ignition coils away to get to the bolts holding the valve cover gasket. If you want to make this job easy, you can remove the wires from the spark plugs, and you will have much more room. You will need a Mercedes-Benz spark plug boot removal tool to do this. It is not necessary, but it will make your job easier. With the coils off and the plug wells open, this is the cheapest time to change the spark plugs, or an ignition coil you already suspect.
-
Use the E10 external Torx socket bit from your bit set to remove the bolts from the valve cover. Here are all the bolts that you will need to remove.
-
Remove the old gasket. Clean the valve-cover groove and cylinder-head sealing surface with a plastic scraper and lint-free cloth. Keep debris out of the engine and do not gouge the aluminum.
-
Install the new gasket and confirm that it is fully seated in the groove, especially along the rear edge. If your gasket set also came with spark plug tube seals, fit those at the same time. Oil standing in the plug wells comes from those seals rather than from the outer gasket.
-
Place the valve cover with the new gasket back in place. Thread all valve cover bolts by hand before tightening them.
-
After threading all bolts by hand, tighten them evenly to 9 Nm, or 80 in-lb. Do not overtighten the bolts because the gasket may deform and leak.
- Repeat the same job on the left valve cover before you reassemble anything.
- Reconnect the ignition coils, electrical connectors, and crankcase ventilation hose. Reinstall the engine cover and air ducts. Start the engine and inspect both valve-cover seams for fresh oil leaks. Keep hands, tools, and clothing away from hot or moving components.




Videos Related to Valve Cover Replacement
Valve Cover Gasket Part Number
Manufacturer Part Number: M112 V6: 112 016 02 21, left; 112 016 03 21, right. Verify both numbers by VIN.
2001 to 2005 Mercedes-Benz C240
1998 to 2000 Mercedes-Benz C280
2002 to 2004 Mercedes-Benz C32 AMG
2001 to 2005 Mercedes-Benz C320
1998 to 2005 Mercedes-Benz CLK320
1998 to 2004 Mercedes-Benz E320
2005 Mercedes-Benz E320 4MATIC
2005 Mercedes-Benz E320 Base
1998 to 2003 Mercedes-Benz ML320
2003 to 2005 Mercedes-Benz ML350
2006 Mercedes-Benz S350
2002 to 2004 Mercedes-Benz SLK32 AMG
2001 to 2004 Mercedes-Benz SLK320
See a strange warning light on your dashboard? Use a YOUCANIC scanner to diagnose and repair your car like a pro!
Before you buy parts, scan every control module, not just the engine. It shows the root fault behind the warning lights and tells you whether the problem is still active. See how to do a full health check.