 MB Medic Mercedes-Benz Repair Guides, Service, How To DIY

Introduction
This repair guide will show you how to replace the front sway bar bushings on an ML, applicable to 1998-2005. The primary purpose of the sway bar is to reduce body roll on corners and improve vehicle stability during highway driving. You should consider replacing the sway bar bushings on your ML if you notice the following:
- Noise in Front Suspension
- Clunking
- Rattling
- Torn Sway Bar Bushings Upon Inspection
- Increased body roll or changes in handling
- Noise when going over bumps
Even though these are common symptoms of failed stabilizer/sway/torsion bar bushings, other suspension components could cause similar problems. Clunking or rattling from the front suspension can also be caused by stabilizer links, ball joints, control-arm bushings, shocks, or other suspension components. Inspect the complete front suspension before replacing the bushings
| Make: | Mercedes-Benz |
| Model: | ML320 ML430 ML350 ML500 ML55 AMG |
| Years: | 1998 1999 2000 2001 2002 2003 2004 2005 |
| Difficulty: | Medium |
| DIY Cost | $20-$50 |
| Time: | 90 minutes |
Parts & Tools Required
To complete this repair, you will need a sway bar bushing kit. There are a total of 4 bushings that will need to be replaced. In this case, we also replaced the sway/torsion bar bracket, which is unnecessary in most cases. If you need new bushings, a Mercedes W163 Sway Bar Mount Bushing Kit Front complete kit sells online for under $30.
DIY Instructions to Remove & Install New Sway Torsion Bar Bushings ML W163
Step 1: Jack up your ML
Before you start, apply the parking brake and securely support the vehicle with appropriately rated jack stands. While this repair could be performed without removing the front wheels, it will be easier to work under the car and remove the bushings if you remove the wheel. Loosen the lug nuts on the front two tires, but don’t remove them yet. Raise the car using your jack and place a couple of Jack Stands Min Rating of 2 tons to secure the vehicle.
STEP 2: Remove the stabilizer-link/outer bushing assembly
Remove the applicable fastener securing the stabilizer link to the suspension. Remove the link/bushing assembly as required for your W163 configuration.
STEP 3: Remove the stabilizer-bar mount bushings
Remove the two fasteners securing each stabilizer-bar bushing bracket to the vehicle and remove the bushing from the bar.
STEP 4 OPTIONAL: Remove the retaining bracket
If you plan on removing the retaining bracket, do so now. You must remove the bolt that secures the retaining bracket to the frame.
STEP 5: Install new inner sway bar bushing
Now that all the brackets are removed, slide out the inner sway bar bushing and install the new bushing. Install the bushing in the same orientation as the original. If the replacement bushing has an offset bore, molded marking, slit, or other orientation feature, follow the manufacturer’s specified orientation.
STEP 6: Install the new retaining bracket
If you are replacing the retaining bracket, install the new bracket. Torque the bolt that holds the retaining bracket to the frame to 100 Nm. Next, install the bracket and the two bolts that hold the inner sway bar bushing to the retaining bracket. Tighten the two bolts to 50Nm.
STEP 7: Install the outer sway bar bushing.
Install the outer sway bar bushing. Tighten the bolt to approximately 65 Nm.
Recommended Parts
Related Part Numbers
- Stabilizer / Sway / Torsion Bar bushing Outer 1633200373
- Sway Bar Bushing Kit 1633200044
Part numbers and stabilizer-bar components vary by model year and chassis. Verify the correct parts by VIN before ordering.
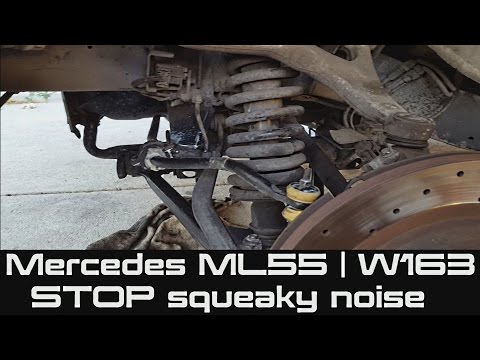
VIDEO How to STOP squeaky noise | Bushings | Sway Bar REAR on Mercedes ML55
Torque Specifications
- Retaining bracket to frame bolt: 100 Nm.
- Bolt to lower control arm: 65 Nm.
- Retaining bracket, inner bushing, two bolts: 50Nm.
We want your feedback!
Use the comments section below to share your experiences or tell us what we can do to improve the article.

